Saturday, December 31, 2011

Crocheted Baby Elephant

I'M BAAAAACCCKKKK!!!

Okay, here is the promised crocheted elephant, finally finished. I have learned that one has to actually WORK a project if one wants to ever see it FINISHED! (hahahaha)
This is very easy, but I was just lazy about crocheting. I'd crochet about once a week, and for only a little while at a time. I made up my mind last night that I was going to finish it today, so set out to do just that. I was tired of waiting to see the end result. And, boy oh boy, am I glad I did...
   ...isn't this little guy just the cutest thing???


 This is a close up of where the "arm" attaches to the "neck".


 And this is where the leg is sewn onto the bottom of the elephant.


For anyone that may want to make one of their own crocheted baby elephants, I got the pattern off of red heart yarn website. It is free, downloads in pdf format so it is easy to print, and they have LOTS more free patterns also. Here is a link to the elephant pattern:

http://www.redheart.com/free-patterns/babys-elephant
 
 I hope it works for you. I'm still new at this blogging stuff and sharing links, etc. Thanks for bearing with me while I learn. :-)

Well, I hope you all have enjoyed seeing my latest finished project. My Mom and I are thinking about crocheting and knitting my brother a little jacket and a bed for his new puppy. If we decide to do them, I will be putting them on here. I want to put some soap here also, but am waiting to get a good camera so the pictures look better.

Thanks for visiting and hope you come back again.

Sunday, December 18, 2011

Crocheted Bangle Bracelet

Hello again blog world. I have been away too long. I'll get right onto the bracelet now.


I finally finished the crocheted bracelet that I have been promising you all. It isn't bad for my first attempt, but I am a bit disappointed in the size. I have very small wrists and the "bangle" made from the glass is a bit big on me...but the granny squares turned out great and I am very happy with them. I will be making another bracelet WITHOUT the plastic bangle insert. That is another blog, though.

Here are all the supplies I used for the crocheted part (the only other item used is the plastic "bangle" made from the glass-see previous blog:. Four different colors of size 10 crochet thread, and a size 5 hook.


I have a few granny squares started (sitting on top of the pink thread). I made a total of six granny squares for this bracelet, but you can make as many or as few as you choose to. Only one would look quite striking on a solid background.


Here they are after the second round has been crocheted. (Aren't they such cute little things?)


And this is after the third round has been added. Looks like a granny square now. (I just love these colors!)


Once the granny squares were completed, I started joining them with a sc (single crochet). I held two squares together with the wrong sides together, and I worked sc in each stitch from one corner to the other. Once I reached the corner, I opened the two joined squares and continued to sc along the edge of ONE square. When I reached the next corner, I placed another square wrong side to the wrong side of the square I just stitched and I worked sc in each stitch of BOTH squares from that corner to the next. I then opened those squares up and proceeded to sc along up the remaining "raw" edge of the middle square and then continued along the raw edge of the other "original" (the first two squares) middle square. Once I reached the far corner of the second original beginning square, I placed a fourth square wrong side to the wrong side of second original square and worked sc through them both from corner to corner. I opened those squares up and worked sc back down the last raw edge of the second original square. I now have four squares joined, with sc worked completely around the center two. I tied off and cut thread.

Now I attached the thread at the corner where I joined the first and third squares. I worked sc along the edge until I got to the corner, then I joined the fifth square to the third from corner to corner. Then I worked sc on the third square back to the opposite corner where I joined the first square to the third square. I now have squares one, two and three completely surrounded. I tied and cut thread. I repeated this step to add the sixth square to the fourth square on the opposite end.

After all the squares are joined, I have to finish the edging on the fifth and sixth squares. So I attached the thread at the corner where the third and fifth squares are joined and worked sc around the fifth square, tying off and cutting thread at the opposite corner where the third and fifth squares join. I attached thread again at the corner where the fourth and sixth squares are joined and worked sc around as I did before.


Whooooo...Now the hard part is over! From here on out, I just worked sc back and forth on one end until the bracelet was long enough to go around the plastic bangle. (If leaving the plastic out, make it long enough to fit comfortably around your wrist...remembering to take into consideration the method you will use as a fastener.) * Do NOT cut thread.*

Once it was long enough, I started working sc down the long edge of one side to make the bracelet wide enough to wrap around the inside of the bangle. I worked sc back and forth until it was wide enough, then tied off and cut thread, leaving a tail long enough to lace or stitch the crocheted piece around the plastic piece.


So now I whip stitched the ends together, slid the plastic bracelet into the crocheted sleeve and proceeded to whip stitch the edge together around the plastic. Tie off and weave in loose ends.
NOTE: some of the loose ends can be hidden under other sc stitches as you crochet and/or hidden when you sew the crochet onto the plastic.

And FINALLY here is the finished product!


As I said, it's a bit big for my wrist but it fit my Mom perfect. :-)

I am now working on a crocheted stuffed baby elephant for my oldest niece's baby boy. He will be here in April (her birth month also!) so I have a bit of time to finish it. It is REALLY easy though, so I will be done with it WAY before then. I got the pattern from redheart.com. Instead of using boring ole gray yarn like they did, I'm using some pretty variegated blue/white/mauve yarn. I think Cole will love it. (Babies do like colors!) I will post pictures when it is finished. I will be writing a blog with pictures of all the stuff I made for baby Cole!

Saturday, December 3, 2011

Wire jewelry

Hello again Blog World.

I have been busy crocheting the "wrapping" for my bangle bracelet, going to doctors appointments and trying to stay WARM. (My desert blood isn't used to this chill!) It's been raining for several days now and will be for several more days. Higher elevations are getting LOTS of snow, so the skiing should be good this year.

I am just going to share some rather lousy pictures of my first few attempts at wire wrapping.
I LOVE the look of wire wrap jewelry, but have been intimidated by it so have never tried it. I just love it though, so I finally broke down and am starting to try to learn how to do it. I started off just looking at others work on the Internet and then I started getting books out of my local library. (They only just started buying them so there are only a few.)
As you can see from the following pictures, I still need LOTS of practice!!! But it is really fun so I will keep doing it. They say "practice makes perfect"...I better get back to practicing right after I type this blog, cause I have a LONG way to go!
I apologize before hand for the horrible quality of the pictures. I took them on my cell phone camera and it isn't good for closeups. I am working on getting a good camera, but I'm not sure exactly when I will have it in my hands and can start using it. I hope soon because I think the photos in a blog are what make the blog. They tell a story that words can't. (I think the story mine are telling must be horror stories!)   ;-)


Okay, here goes...are you ready?


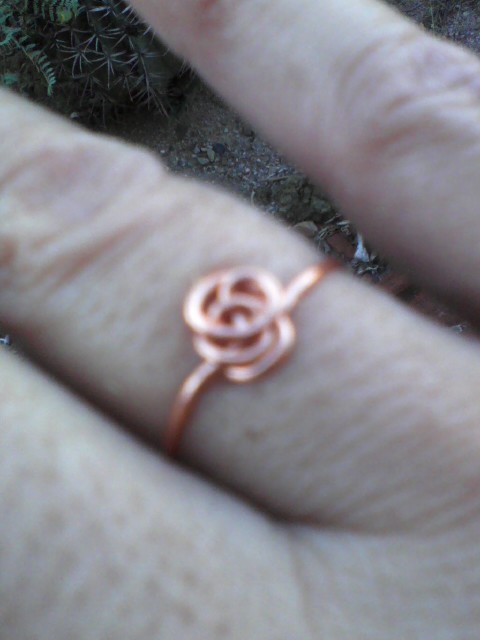
My very first attempt at wire wrapping...a delicate little ring. It's called a knot but I think mine looks almost like a rose. What do you think? (Besides that the photo is seriously yucky? Lol.)

Here is another shot of it.


Okay, on to the second project I made. Another ring, made the same day as the previous one. Not quite so delicate, this one. (Picture are still horrid though. Sorry.)


And another one...


Hang in there...there is just one more project...then I promise you can go rinse your eyes out so they may be able to recover from this horrible photography. 


Here is my first attempt at adding beads to the wire. And its my first bracelet.

And one more photo of the bracelet...
I promise, I will keep practicing (although I can't promise that it will make me better.) I do have faith in this mysterious "they" that says "Practice make Perfect", so maybe there is hope for me yet. (And None will be as glad as I when I finally get my camera and can start showing you all half way decent photos!)

Thanks for hanging out with me once more. Remember, I'm working on the crocheted bracelet and will be posting it (hopefully soon!)

See you again next time.